Android Studio stands out as the go-to integrated development environment (IDE) for creating, testing and debugging Android applications in the vast world of Android development. With the power of Android Studio, it is possible to understand How To Edit APK File In Android Studio to unlock the potential for customization and modify APK files to suit your preferences.
https://www.youtube.com/watch?v=ZysLMmSrerUEditing an APK file can be valuable whether you want to modify an existing app or create your own. In this article, we will explore the process of How To Edit APK File In Android Studio, empowering you to make personalized modifications to Android apps. Whether you want to tweak the app’s user interface, add new features, or enhance existing functionalities, this guide will provide you with the essential steps.
Why do you need to Know How To Edit APK File In Android Studio
Before we dive into editing an APK file in Android Studio, let’s discuss why you might want to know How To Edit an APK File In Android Studio. There are several reasons why you might want to edit an APK file:
To modify an existing app
To remove ads
To add new features
What do You need
Before getting started the process of How To Edit APK File In Android Studio, you need to following things:
Setting up Android Studio
Once you have downloaded and installed Android Studio, you need to set it up for app development:
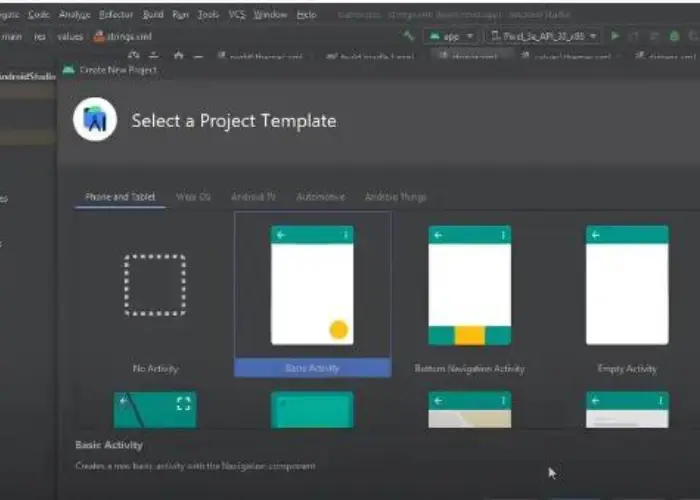
- Open Android Studio and choose “Start a new Android Studio project” from the welcome screen
- Choose a project template and configure your project settings

- Click “Finish” to create your project
Importing an APK File
To import an APK file into your Android Studio project, follow these steps:
- Click on the “File” option in the menu bar and select “New” > “New Module.”
- In the “Create New Module” window, choose the “Import” option. JAR/.AAR Package” and click “Next.”
- Browse and select the APK file you want to import and click “Finish.”
Decompiling the APK File

To decompile an APK file, you must convert it into its source code. Follow these steps:
- Right-click on the imported module in the “Project” window and select “Show in Explorer.”
- Copy the APK file to a directory of your choice.
- Open a command prompt window and navigate to the directory where you copied the APK file.
- Run the following command: “java -jar apktool.jar d [apk-file-name].apk.” Replace [apk-file-name] with the name of your APK file.
- Wait for the process to complete. The source code will be extracted to a new directory with the same name as the APK file.
Editing the Source Code
Once you have decompiled the APK file, you can edit its source code using any text editor or IDE. We recommend using Android Studio, which provides syntax highlighting and code completion features.
To edit the source code using Android Studio, follow these steps:
- In Android Studio, click on “File” > “Open” and navigate to the directory where you extracted the source code.
- Select the “build. gradle” file and click the “Open as Project.” option.
- Complete the required changes to the source code.
- Once you are done, save your changes.
Recompiling the APK File
To recompile the APK file, you must convert the edited source code back into an APK file. Follow these steps:
- Open a command prompt window and navigate to the directory where you extracted the source code.
- Run the following command: “java -jar apktool.jar b [source-code-directory-name].” Replace [source-code-directory-name] with the directory name where you extracted the source code.
- Wait for the process to complete. The recompiled APK file will be generated in the “dist” directory.
Signing the APK File
To sign the APK file, you must first create a keystore file. A Keystore file is a file that contains a private key and a certificate, which are used to sign the APK file.
To create a keystore file in Android Studio, you need to follow these steps:
- Click on the “Build” menu, then select “Generate Signed Bundle / APK.”
- In the “Generate Signed Bundle or APK” dialog box, select “APK” and click on the “Next” button.
- Click the “Create new” button Present In the “Key store path” location.
- In the “New Key Store” dialog box, enter a name for the Keystore file, and choose a location to save the file. Please enter a password for the keystore file and confirm it. Fill in the other required fields, such as “Alias,” “Validity (years),” and “First and Last Name.”
- Click on the “OK” button to create the keystore file.
Once you have created the keystore file, you can sign the APK file by following these steps:
- Click on the “Build” menu, then select “Generate Signed Bundle / APK”
- In the “Generate Signed Bundle or APK” dialog box, select “APK” and click on the “Next” button
- In the “Key store path” field, click the “Choose existing” button and select the keystore file you created earlier
- Enter the password for the keystore file and click on the “Next” button
- In the “Key alias” field, select the alias you created earlier
- Enter the alias’s password and click the “Next” button
- Choose a destination folder for signed APK file and click the “Finish” button
Android Studio will now sign the APK file with the digital signature from the keystore file. The signed APK file can now be installed on an Android device.
Also, Check this Guide>>>> How To Modify APK Without PC [3 Easy Ways]
Conclusion
In conclusion, Understanding How To Edit APK File In Android Studio can be a valuable skill for developers and users alike. By making changes to an app’s code, resources, or other assets, you can customize an app to your liking or fix bugs and issues. With the right tools and knowledge, editing APK files can be straightforward. However, it’s important to remember that distributing modified APK files without permission is illegal. As long as you’re using your newfound knowledge for personal use or within the bounds of the law, editing APK files can be a valuable skill to have in your toolkit.

